I may be getting used to short posts, but here it comes: this will be another zippy one! The other day, I realized something quite interesting about the Jupyter notebook (in fact, it comes from IPython…) magic %load. You can use it with an URL!
Ok, this is a straight to the point post! In previous posts I explained how to save an image directly from your webcam. However, that method was using OpenCV and it can only access hardware connected to the host (where the Jupyter notebook server is running). One classic example where you can’t access a webcam directly is Google Colaboratory. As I said at the beginning, you can only access the hardware from host, so the microphone also will not be available. Javascript to the rescue!
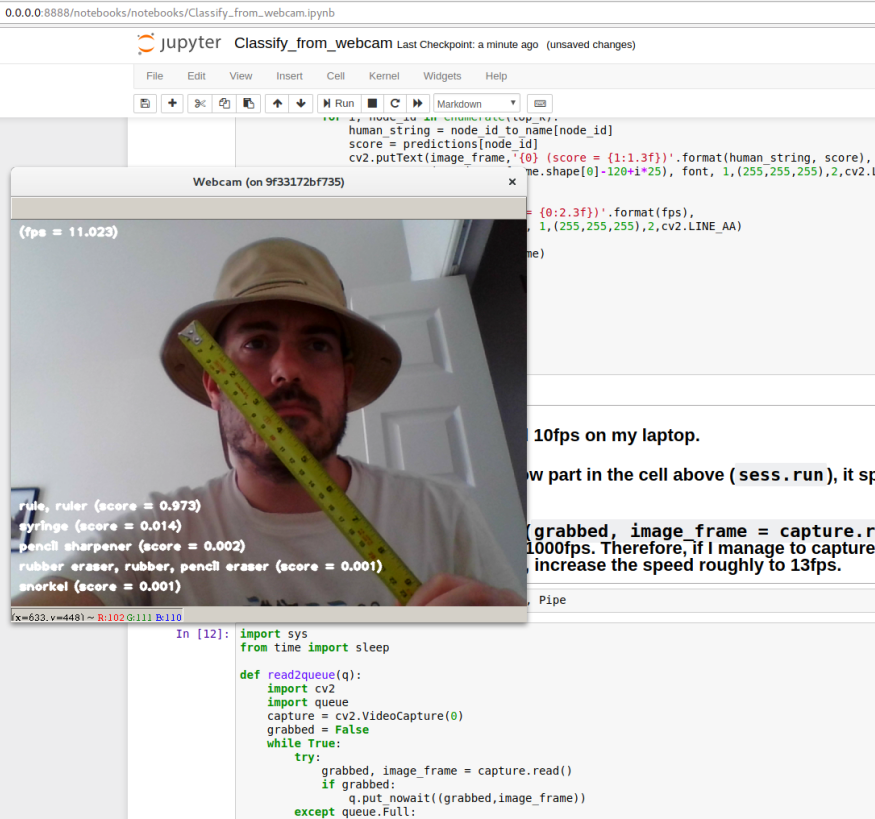
My last post was all about creating a TensorFlowdocker image that would work with OpenCV, inside a Jupyter notebook, creating external windows, accessing the webcam, saving things using the current user from host, etc. All that hard work had a reason: use the newest version of TensorFlow for computer vision. So, let’s try it!
Without the hat and the measuring tape, it was 0.9 for mask.
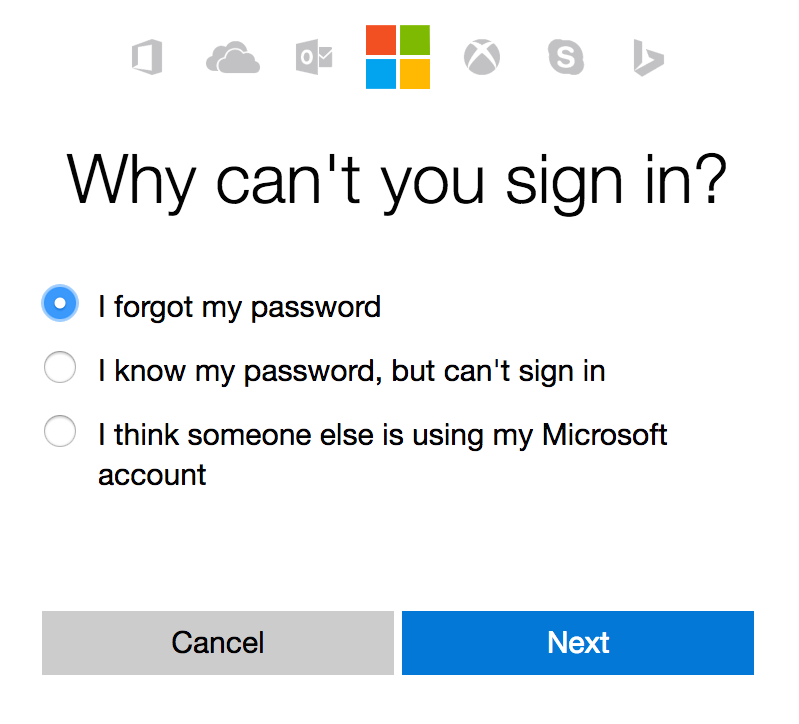
Currently, I’m a last year Robotics / Artificial Intelligence Ph.D candidate (don’t be shy, have a look at my publications), father of a 7-yrs-old boy and I’m living abroad with my family since 2013. So, life is quite busy, a little bit stressful and it happens that, sometimes, I simply forget things. The other day, I was setting up a new Dell laptop (I’ve bought it really, really cheap from their UK outlet, free delivery and I even got an extra student discount!) that came with Windows 10 and, as always, I created a very hard to guess password. It was so hard to guess that I forgot it after a week! And that’s how the idea for this post began.
Around one week ago, I’d attended a CUDA workshop presented (or should I say conducted?) by my friend Anthony Morse and I’m still astounded by DIGITS. So, during the workshop, I had some interesting ideas to use on this post!
The first thing I thought when I read (or heard?) for the first time the name Convolutional Neural Network was a bunch of filters (Gimp would agree with me). I’m an Electrical Engineer and, for most of us (Electrical Engineers), convolutions start as nightmares and, gradually, become our almighty super weapon after a module like Signal and Systems.
Let’s start with something easy… a video! Below, you can observe, step-by-step, what happens when a 2D convolution (think about a filter that detects, or enhances, edges) is applied to an image:
When you start playing with cloud computing like Amazon Web Services, you will, sometimes, decide to launch a program that will take a while to run. If you simply close the connection before all processes are finished, the system will terminate bash (or whatever shell you were using) and, therefore, your program will be also terminated. Normally, when we are working on a terminal, we make use of the & (or ctrl+z and bg) to send things to the background freeing the terminal. If you sent your process to background, you will be able to use jobs to display information about processes that are sleeping (the ctrl+z thing) or running on the background.
This post is a personal reminder. I’m always forgetting Ubuntu (up to 16.04), doesn’t know how to mount exFAT - Extended File Allocation Table and then I need to Google for it. Why would you need exFAT? Among other things, it’s possible to have files bigger than 4GB.