A TensorFlow docker image to rule them all
04 May 2018
Today I’m in need to develop an algorithm to segment some special stuff on an image and my old TensorFlow docker image is… too old to invest time on it. So I decided to pull a new Docker image for the latest TensorFlow with GPU enabled and Python 3 (2020-01-01 is Python 2 end-of-life). The image of my choice was tensorflow/tensorflow:1.8.0-gpu-py3. Pulling that image was as easy as typing:
$ docker pull tensorflow/tensorflow:latest-gpu-py3
Actually, docker will pull the image the first time you try to use it, but I like to pull it before hand anyway.
After it finished downloading everything, I created/ran (when you use the command docker run, behind the scenes, it does the job of docker create and docker start) a new interactive container:
$ docker run --rm -it -p 8888:8888 tensorflow/tensorflow:latest-gpu-py3
Oops. I forgot to add the arguments necessary to enable my GPU under docker (--runtime=nvidia, see nvidia-docker2 for more details):
$ docker run --rm --runtime=nvidia -it -p 8888:8888 tensorflow/tensorflow:latest-gpu-py3
So far so good. The command above automatically opens/tunnels the port 8888 to the host (enabling you to access jupyter notebooks using the host browser) and this particular image launches, by default, the jupyter notebook server when you start your container.
Up to this point, it’s only possible to access files that are inside the container. However, the container is removed everytime we close it (the argument --rm is responsible for that, it is kind of docker’s philosophy) and that is the beauty of docker containers because they always start as a clean slate. I rather prefer a docker container to a virtual machine or even python virtualenv solutions, but I do like to save my hard work ![]() . It’s very easy to solve this problem by mounting a directory from host inside a container using the
. It’s very easy to solve this problem by mounting a directory from host inside a container using the --volume or -v argument:
$ docker run --rm --runtime=nvidia -it -p 8888:8888 --volume="/home/$USER:/notebooks/$USER" tensorflow_gpu_py3_ready
Now, when the container is created a directory under notebooks will have the current user host home directory (at least using Bash). Everything you create inside that directory will be saved. But there’s one caveat: all the files created in a docker container will be owned by root and you will be able to modify them only inside the container or using the sudo command on the host… not cool.
By googling a way to circumvent this problem, I found a ROS tutorial that had a quick fix passing --user=$USER. Here is my modified version using $UID instead:
$ docker run --rm --runtime=nvidia -it -p 8888:8888 --volume="/home/$USER:/notebooks/$USER" --user $UID:$UID tensorflow_gpu_py3_ready
On the other hand, jupyter stops working because all its config files are owned by root (therefore inside /root) and this new user cannot access them. In addition, the ROS tutorial remembered me that I may want to install OpenCV and commit it to the same image. I personally like to start the development using OpenCV from a jupyter notebook (e.g. using startWindowThread when dealing with video) and that creates a window in need of X11. The ROS tutorial, again, has a very nice solution, but it demands changing the user and this breaks jupyter if there’re no other users besides root.
Up to this point, the image created could be pushed to docker hub without any problems, but if a user is added to match my current one on the host machine, it will not follow the docker philosophy anymore and it will be weird to have such an image on docker hub.
The workaround I found was using what was presented in the ROS tutorial, but with an additional script (add_user.sh) to be called every time the container is created generating a bespoke set of directories and config files. All the magic comes from mkhomedir_helper. I was forced to use it because if you try to add an user, the system will complain saying the user already exists (the docker run argument --user is the responsible, but it’s fine because that is what we want). If you are asking yourself about the $1 inside the script, that variable is the first argument passed to docker run after the name of the image. Finally, the --ip=0.0.0.0 will only allow to access jupyter using that IP (probably not necessary since it already has the token), but it will probably not work if you try starting a container using a different machine and, in this situation, you should omit that option.
#!/usr/bin/env bash
sudo mkhomedir_helper $1
cd /$1
jupyter notebook --ip=0.0.0.0
As can be seen above, the script makes use of sudo (now docker is using the host current user that, I suppose, it’s not root), but the original docker container I pulled from tensorflow doesn’t have it (of course, it’s my local user). Therefore, it’s necessary to install sudo or the script will fail. Also don’t forget to make the add_user.sh executable (chmod +x add_user.sh).
A new dockerfile (New_Dockerfile) will be used here to add the script (COPY add_user.sh) to commit the changes to a new image. And, if you still remember the initial reason why I wanted to have access to X11, it was OpenCV and it will be installed too. Additionally, I will install scikit-image as well. One last thing: every time a container is started, it will call the same script (ENTRYPOINT ["/add_user.sh"]).
FROM tensorflow/tensorflow:latest-gpu-py3
RUN apt-get -y update
# necessary to make add_user.sh work
RUN apt-get install -y --fix-missing sudo
# stuff opencv complains if they are not installed
RUN apt-get install -y --fix-missing \
    libsm6 \
    libxext6 \
    libxrender-dev \
    libgtk2.0-dev \
    libavcodec-dev \
    libavformat-dev \
    libswscale-dev
RUN apt-get clean && rm -rf /tmp/* /var/tmp/*
RUN pip --no-cache-dir install \
opencv-python \
scikit-image
COPY add_user.sh /
ENTRYPOINT ["/add_user.sh"]
Now, to create the image, the following command must be executed on the same directory where add_user.sh and the dockerfile New_Dockerfile are located:
$ docker build -t tensorflow_gpu_py3_ready -f New_Dockerfile .
The command necessary to create/run the container is very very long, so I suggest the creation of an alias inside ~/.bashrc using the command below:
$ docker run --rm -it --runtime=nvidia -p 8888:8888 --user $UID:$UID --env="DISPLAY" --device=/dev/video0:/dev/video0 --volume="/etc/group:/etc/group:ro" --volume="/etc/passwd:/etc/passwd:ro" --volume="/etc/shadow:/etc/shadow:ro" --volume="/etc/sudoers.d:/etc/sudoers.d:ro" --volume="/tmp/.X11-unix:/tmp/.X11-unix:rw" --volume="/home/$USER:/$USER" tensorflow_gpu_py3_ready $USER
The argument --device=/dev/video0:/dev/video0 I added to give the container access to my webcam (video0 because I have only one). Inside the .bashrc (remember to open a new terminal or source ~/.bashrc), I inserted this at its last line:
alias ai_docker='docker run --rm -it --runtime=nvidia -p 8888:8888 --user $UID:$UID --env="DISPLAY" --device=/dev/video0:/dev/video0 --volume="/etc/group:/etc/group:ro" --volume="/etc/passwd:/etc/passwd:ro" --volume="/etc/shadow:/etc/shadow:ro" --volume="/etc/sudoers.d:/etc/sudoers.d:ro" --volume="/tmp/.X11-unix:/tmp/.X11-unix:rw" --volume="/home/$USER:/$USER" tensorflow_gpu_py3_ready $USER'
Please, don’t freak out with the prompt asking your password. Remember the first line of our script needs sudo to execute mkhomedir_helper, so your new container will always ask you that ![]() .
.
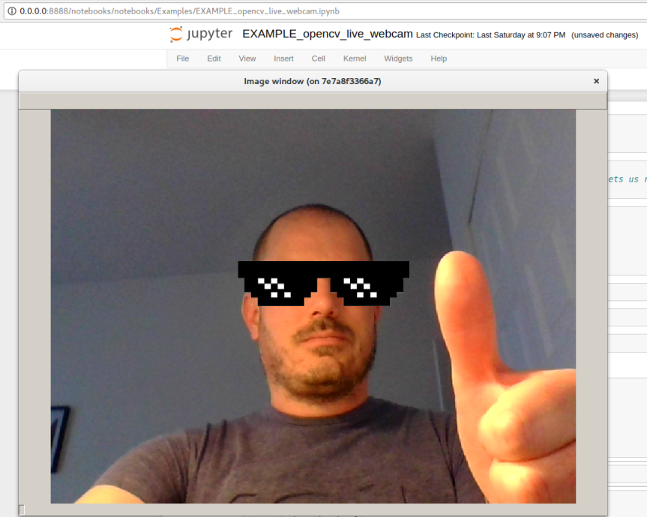
Here is a notebook to test OpenCV running from the new container:
Oops, again. When I ask OpenCV to create a window, it creates the window, but I can’t send anything and the console gives this error message:
X Error: BadShmSeg (invalid shared segment parameter) 128
  Extension:    130 (MIT-SHM)
  Minor opcode: 3 (X_ShmPutImage)
  Resource id:  0x280000a
My fault. I didn’t pay attention to the troubleshooting part of the ROS wiki and I end up learning there are two ways to solve the problem. The first one is to use --env="QT_X11_NO_MITSHM=1" and the second (faster?) --ipc=host, but it may be a security problem because it shares memory, etc.
alias ai_docker='docker run --rm -it --runtime=nvidia -p 8888:8888 --user $UID:$UID --env="DISPLAY" --device=/dev/video0:/dev/video0 --volume="/etc/group:/etc/group:ro" --volume="/etc/passwd:/etc/passwd:ro" --volume="/etc/shadow:/etc/shadow:ro" --volume="/etc/sudoers.d:/etc/sudoers.d:ro" --volume="/tmp/.X11-unix:/tmp/.X11-unix:rw" --volume="/home/$USER:/$USER" --ipc=host tensorflow_gpu_py3_ready $USER'
And, guess what, it worked, but the webcam is still not accessible. It turns out the video device is owned by root and only users from the video group (or root) can access it.
One step I forgot to mention, the option --user specifies user:group, but if you were paying attention, I’m not using $USER, but $UID instead. The current image contains only one user (root), therefore if you use --user $USER if spits an error:
docker: Error response from daemon: linux spec user: unable to find user my_host_user: no matching entries in passwd file.
Linux doesn’t care so much about the user’s name and using user’s id instead of name the above error is fixed (1000 on Debian for the first non-root user). I could modify that particular option to --user $UID:video, but all the files created using the container would have the group video - probably not a good idea. Docker run has an option for adding an extra group to the current user (--group-add). By only additionally adding the group video makes me lose my sudo powers, so I will add all my host user groups using bash and a trick to force printf to print ‘–’:
alias ai_docker='docker run --rm -it --runtime=nvidia -p 8888:8888 --user $UID:$UID $(printf -- "--group-add %s " $(groups)) --env="DISPLAY" --device=/dev/video0:/dev/video0 --volume="/etc/group:/etc/group:ro" --volume="/etc/passwd:/etc/passwd:ro" --volume="/etc/shadow:/etc/shadow:ro" --volume="/etc/sudoers.d:/etc/sudoers.d:ro" --volume="/tmp/.X11-unix:/tmp/.X11-unix:rw" --volume="/home/$USER:/$USER" --ipc=host tensorflow_gpu_py3_ready $USER'
And… it didn’t work. Docker complains it can’t find the first group (my username at host). Let’s try adding the video and sudo groups manually:
alias ai_docker='docker run --rm -it --runtime=nvidia -p 8888:8888 --user $UID:$UID --group-add video --group-add sudo --env="DISPLAY" --device=/dev/video0:/dev/video0 --volume="/etc/group:/etc/group:ro" --volume="/etc/passwd:/etc/passwd:ro" --volume="/etc/shadow:/etc/shadow:ro" --volume="/etc/sudoers.d:/etc/sudoers.d:ro" --volume="/tmp/.X11-unix:/tmp/.X11-unix:rw" --volume="/home/$USER:/$USER" --ipc=host tensorflow_gpu_py3_ready $USER'
Voilà, c’est vivant! (bear in mind I’m currently living in Montréal and I’m trying to learn French)
Finally I have a docker image that has everything I need and follows docker philosophy of being a clean slate when you create a new container. Now it’s time to test TensorFlow… but I will leave this for the next post because this one was way too long ![]() .
.
Cheers!
UPDATE (16/05/2018): A post testing the docker container using TensorFlow can be found here.
UPDATE (17/05/2018): The command to build the image had a typo. Now it’s correct:
$ docker build -t tensorflow_gpu_py3_ready -f New_Dockerfile .
UPDATE (31/01/2019): New post with an UPDATED image is available!